A Discord bot that makes scheduling easy
Note: you're currently viewing the Dota version. This version supports Dota 2 inhouses and its configuration is a bit trickier because you need a Steam Bot. If you're looking for the standard version, go here.
ScheduleBot is a bot that manages events, such as a practice game with your team, or a league inhouse, or a tournament match.
- Dota inhouses: the Dota version makes it easy to create inhouses, as you can link an event to an inhouse. A Dota bot will automatically create a lobby and invite every player who have confirmed their attendance.
- Time zone handling: ScheduleBot manages timezons for you. If there are European and
American people on your team, if an European creates an event, Americans will be able to convert
it to their timezone with the
convertcommand. - Confirm and reject handling: ScheduleBot allows users to confirm or deny their attendance to an event, so you can see who and how many people are you gonna play with. ScheduleBot can also limit how many people can attend an event.
- Admin commands: ScheduleBot allows elevated privilege commands with
schedulebot-admin. Admins can perform actions such as removing events, or blacklisting an user to prevent them to use the bot. - Linking an event to a role: ScheduleBot allows events to be linked to a role, so that members of that role can be notified when they are required to confirm or deny attendance to an event.
There are two ways to run ScheduleBot. You can deploy it to Heroku or install it in your machine locally.
If you want to host ScheduleBot locally, you'll need to have your computer on 24/7 (provided you need the bot running 24/7), and you'll need to install a few programs.
If you want to deploy it to Heroku, you'll need a Heroku account. You don't need to spend any money, since their free plan is good enough. However you'll need to verify your account with your credit card to have the bot running 24/7 (unverified accounts get 450 hours per month of uptime, which is not enough to cover a full month. Verified accounts get 1000 hours, which is enough). As long as you don't enable any paid service you won't get charged anything.
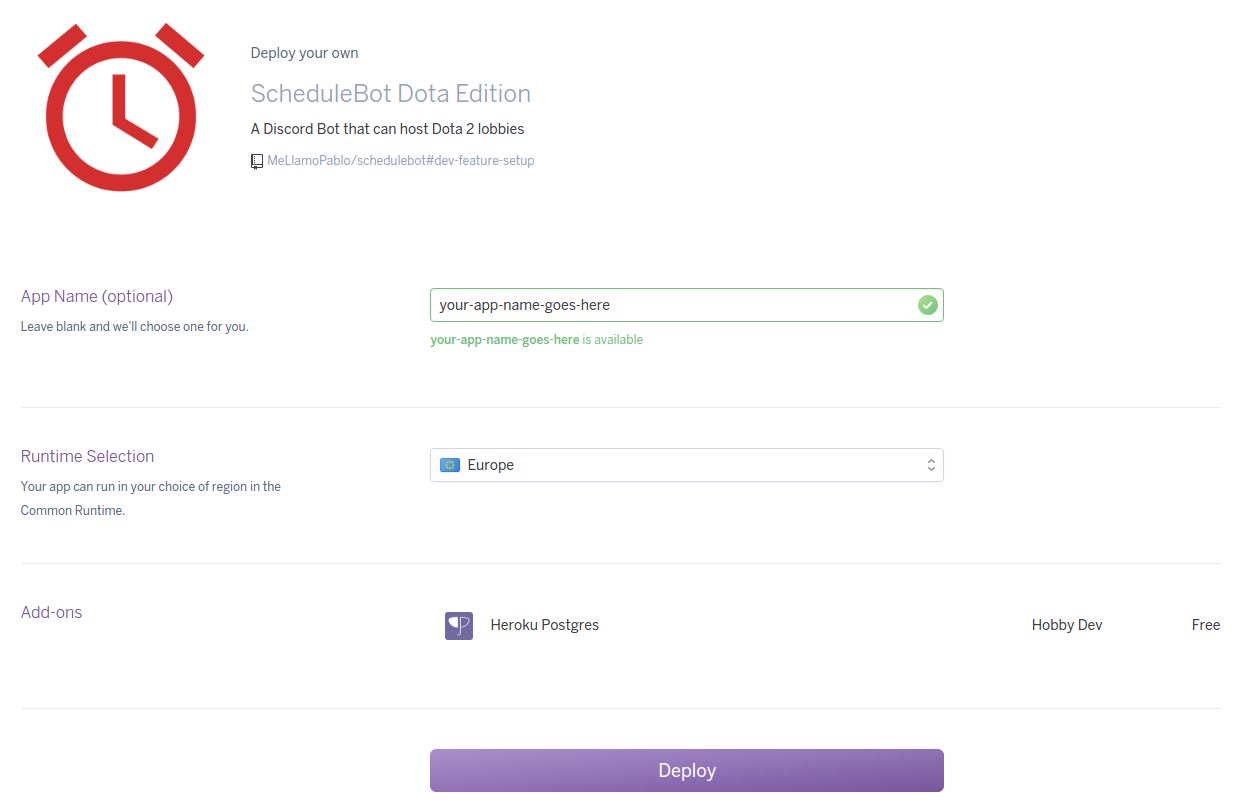
In order to deploy the bot to Heroku, simply click on the following button:
You'll be asked to log in or sign up. Then you'll be asked to choose an app name, and a server.
After that, you may press Deploy.
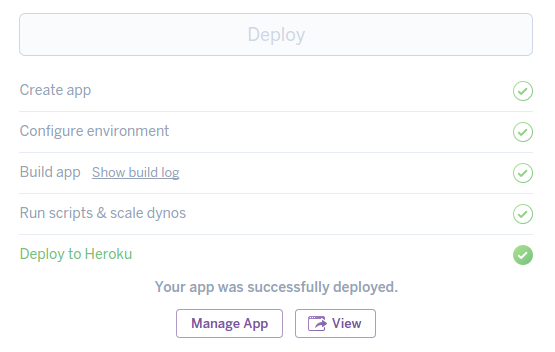
After you see the message Your app was successfully deployed, you can click View to enter the
Setup page.
Follow the instructions in that page and you'll have your bot up and running soon.
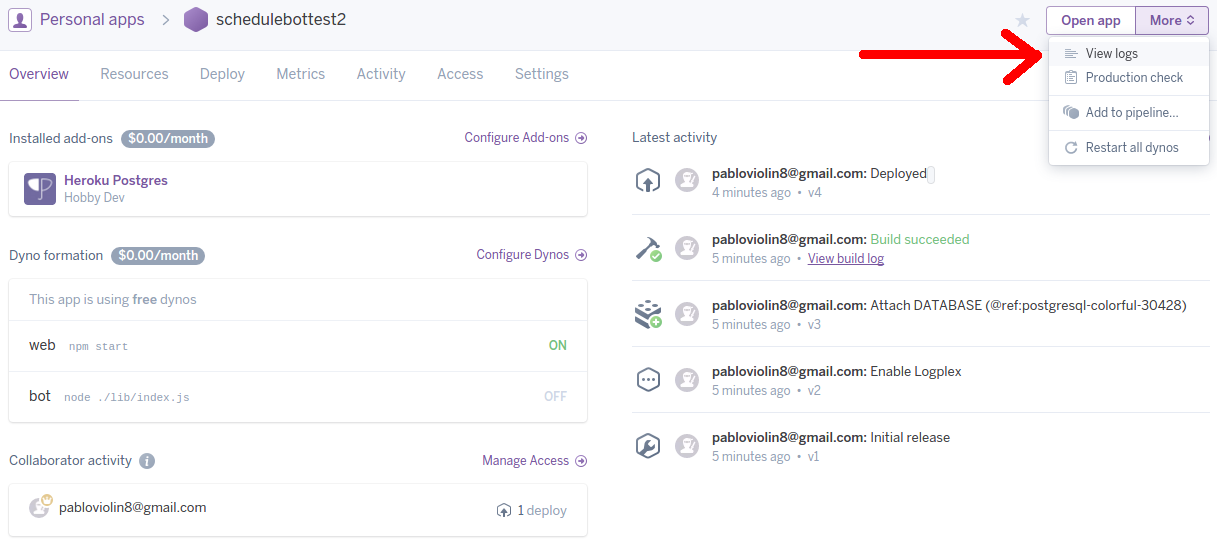
If you encountered any problems, you should check the app logs. In order to get there, click Manage App, and in that panel, go to the right corner, click on More, and then View logs:
To run ScheduleBot locally, you will need:
- NodeJS 6 or above.
- PostgreSQL.
- You'll need to create an empty database for ScheduleBot.
- git, so you can easily clone this repo.
Start by cloning this repo, and then install the dependencies. In a command line (if you're on
Windows and have no idea what that means, open the Git Bash program that was installed with git),
do:
$ git clone https://github.com/MeLlamoPablo/schedulebot.git
$ cd schedulebot
$ npm install
Now make sure that postgres is running and launch the setup server by doing:
$ npm run setupEnter your database settings. When asked if you want to connect over SSL, unless you have configured your postgres server to use it, you should say no. Then visit the setup site at http://localhost:3000. Follow the instructions in there.
Note: an .ENV file containing your database settings will be created at your bot's directory.
Do not delete it, as it's needed by the bot to work.
Once you click the Deploy Bot button, you can run then your bot with:
$ npm run botAfter installing your bot, you might want to check out the usage guide.
Updating your bot is easy. If you're on Heroku, run the schedulebot-admin config-mode command and
enter the Setup site. You'll be prompted to update if there are new versions. That's all you need to
do.
If you're not running on Heroku, you need to manually shut down the bot and launch the setup server
with npm run bot. Then, you'll be prompted to update on the Setup site as well. Except that will
only update your database, so you'll need to manually update your bot. This is easy thanks to git:
$ git pullYou're now ready to run your bot again.
The change log can be found at the releases section.
Apache-2.0 © Pablo Rodríguez


